
How to Make Patriotic White Chocolate Covered Marshmallows

Make these fun and festive patriotic chocolate covered marshmallows using white chocolate, red and blue candy melts, and sprinkles! Perfect for 4th of July parties, homemade gifts, or an easy treat the kids can help decorate.
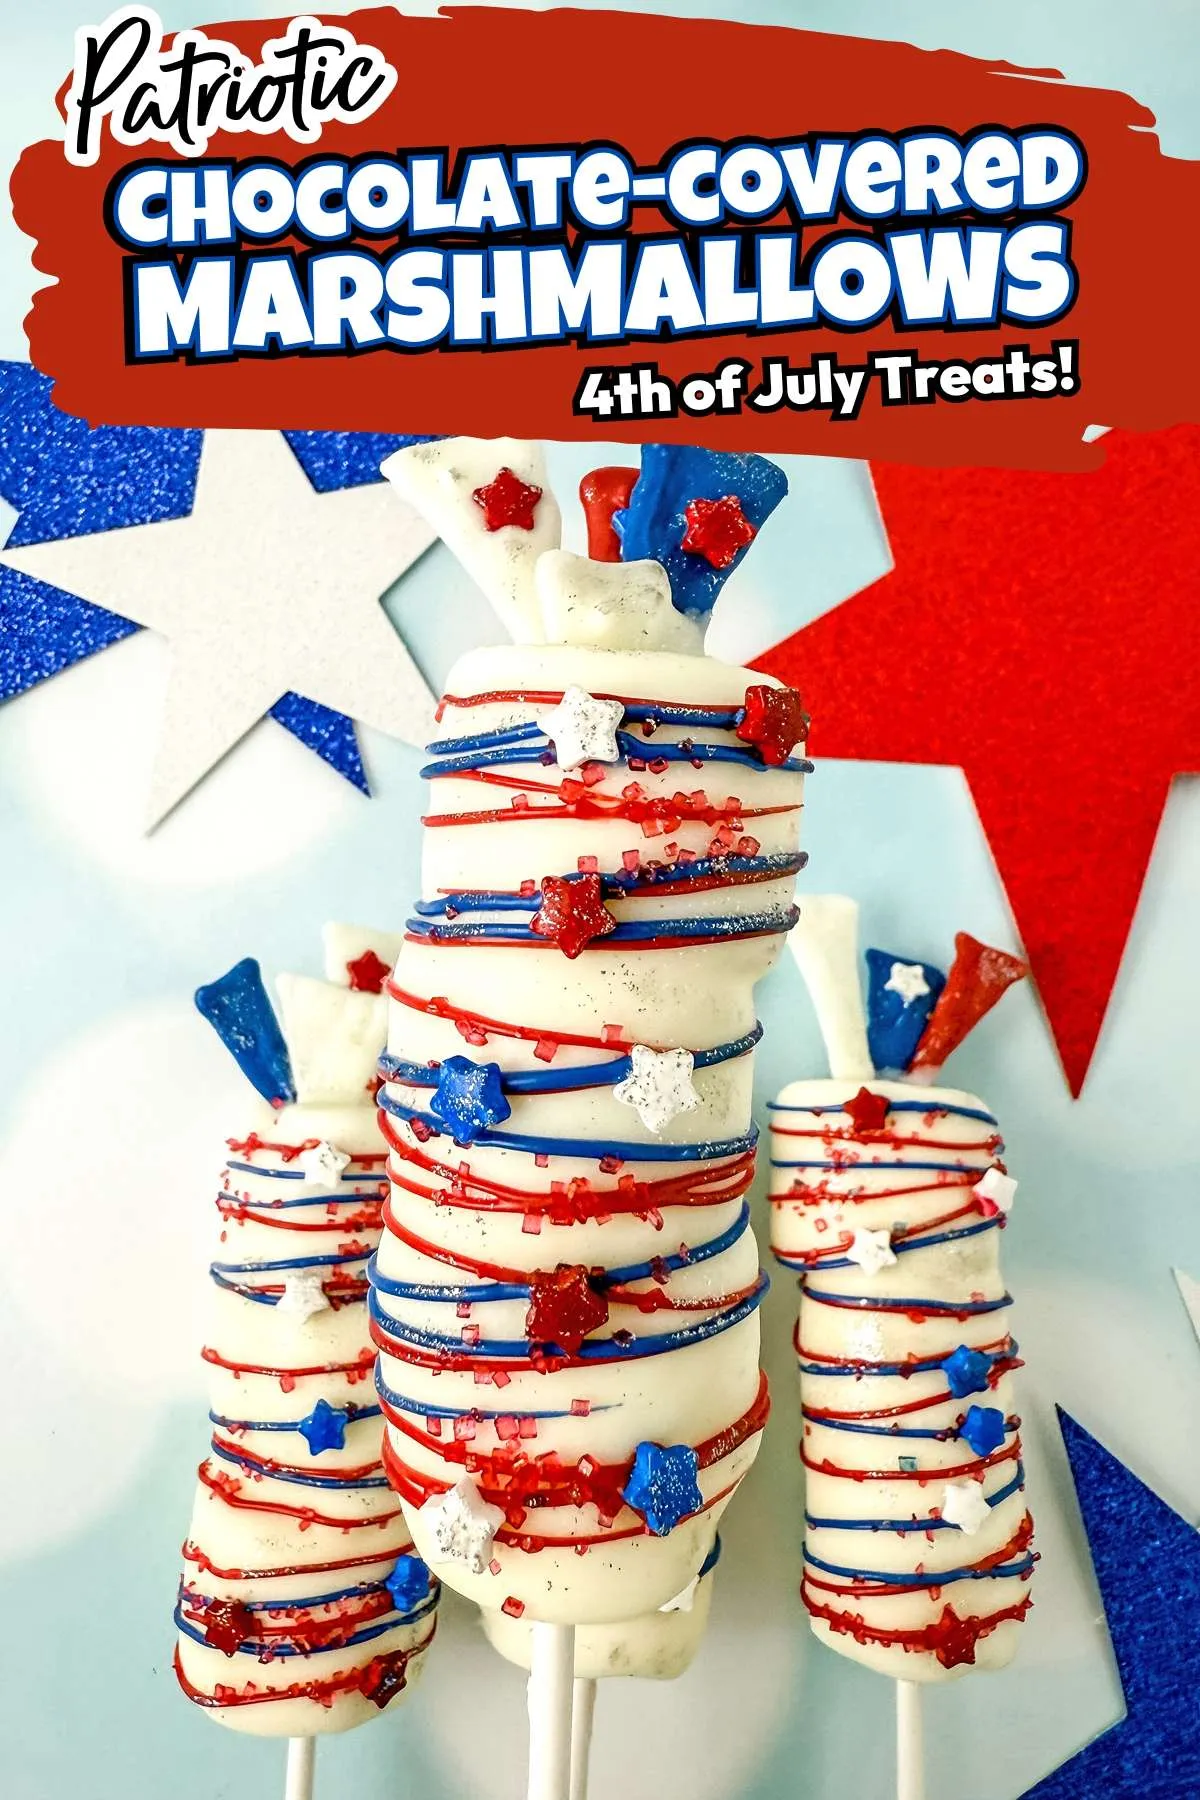
What Are Chocolate Covered Marshmallows?
If you’ve never tried making chocolate-covered marshmallows, prepare yourself because you’re about to meet your new go-to party treat. These sweet bites are dipped in melted chocolate and decorated with colorful toppings, and they are just as fun to make as they are to eat. You don’t need any baking experience to make these adorable treats. Even if it’s your first time working with candy melts, this recipe is perfect for you.
Chocolate-dipped marshmallows are a simple, crowd-pleasing treat you can make any time of year. And with just a few ingredients, you’ll be amazed at how quickly they come together. Let’s get started!
Why You’ll Love Chocolate Covered Marshmallows

How to Make Chocolate Covered Marshmallows
This is one of those recipes that’s almost too easy. Here’s what you’ll need:
Equipment:
- piping bags
- microwave-safe bowls
- spatula
- tall glass
- parchment paper
- lollipop sticks
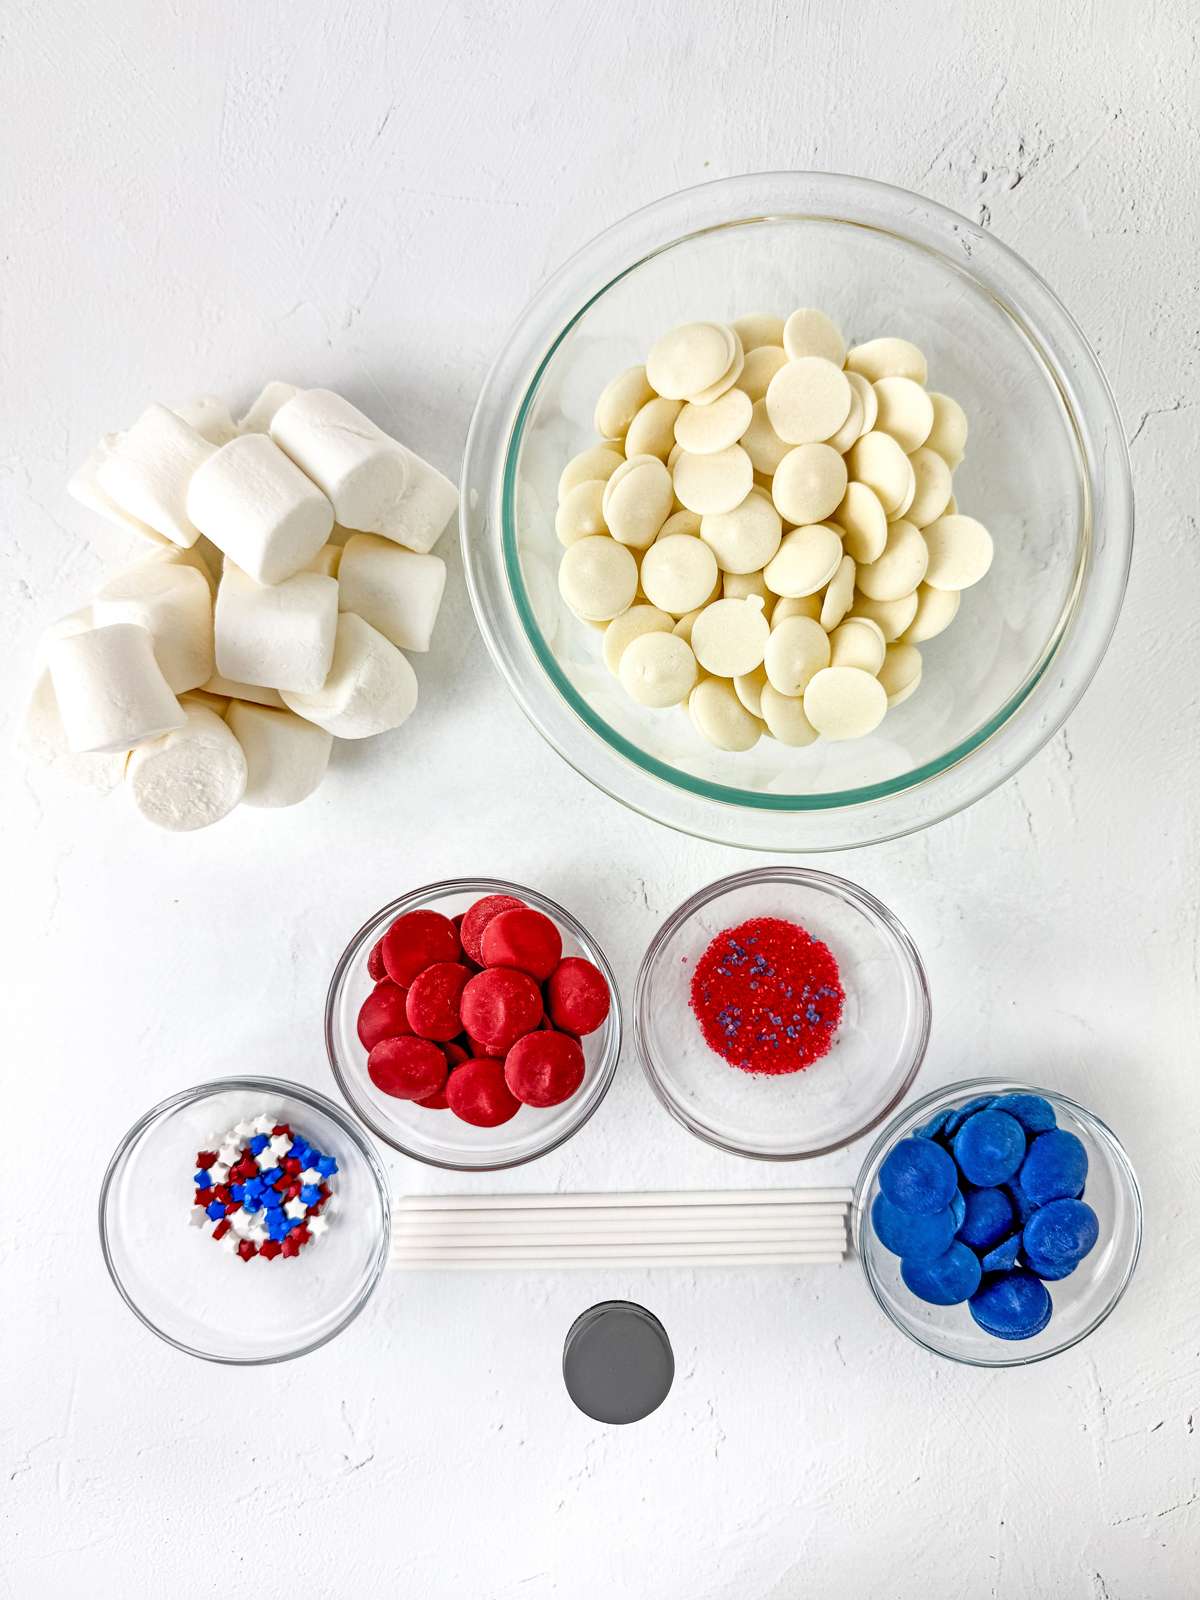
Ingredients:
- 24 regular marshmallows
- 10 oz white candy melts
- 3 oz red candy melts
- 3 oz blue candy melts
- Red, white, and blue sprinkles
- 1 pack Pop Rocks
- Red and blue sanding sugar
- Edible glitter
- Coconut oil (optional for smoother chocolate)
Step-by-Step Instructions:


- Prep your station: Line a baking sheet with parchment paper. Stick 3 marshmallows on each lollipop stick.
- Melt the chocolate: In a microwave-safe bowl, melt the blue candy melts in 15-30 second intervals, stirring in between. If the chocolate seems too thick, stir in some coconut oil to thin it out.
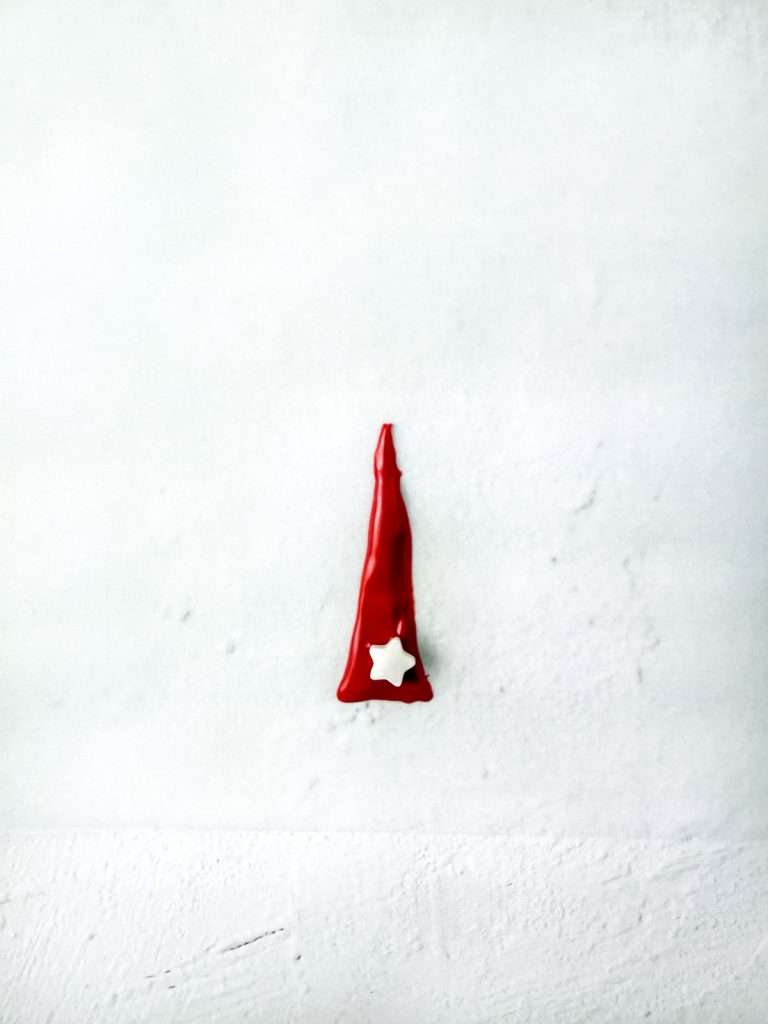
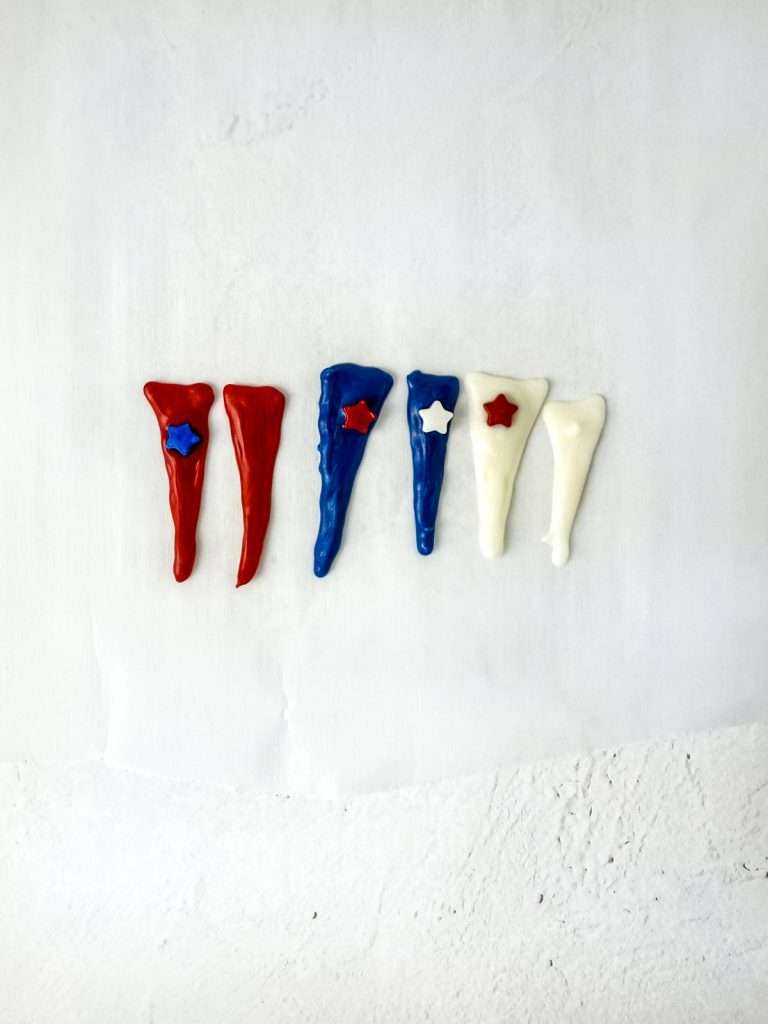
- Make the toppers: Put the chocolate in a piping bag and snip off a small hole at the end. Pipe 2-inch triangles on the parchment paper. Add some sprinkles before the chocolate hardens. Repeat this process with the red and 3 ounces of the white candy melts to have red, white, and blue triangles.
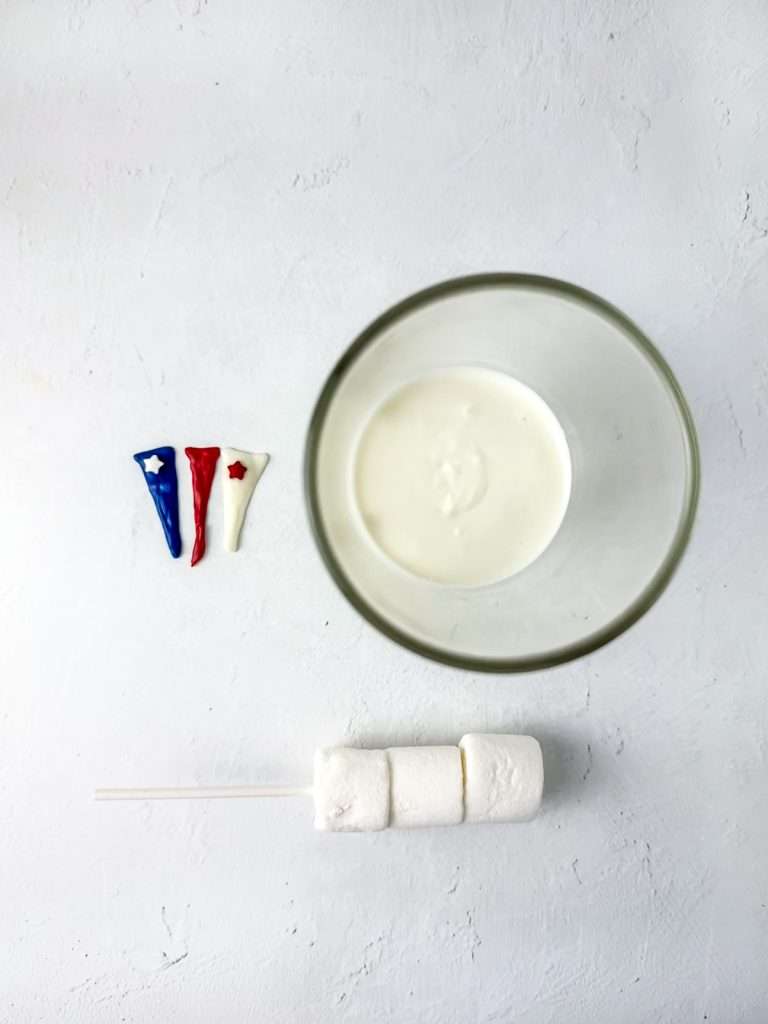
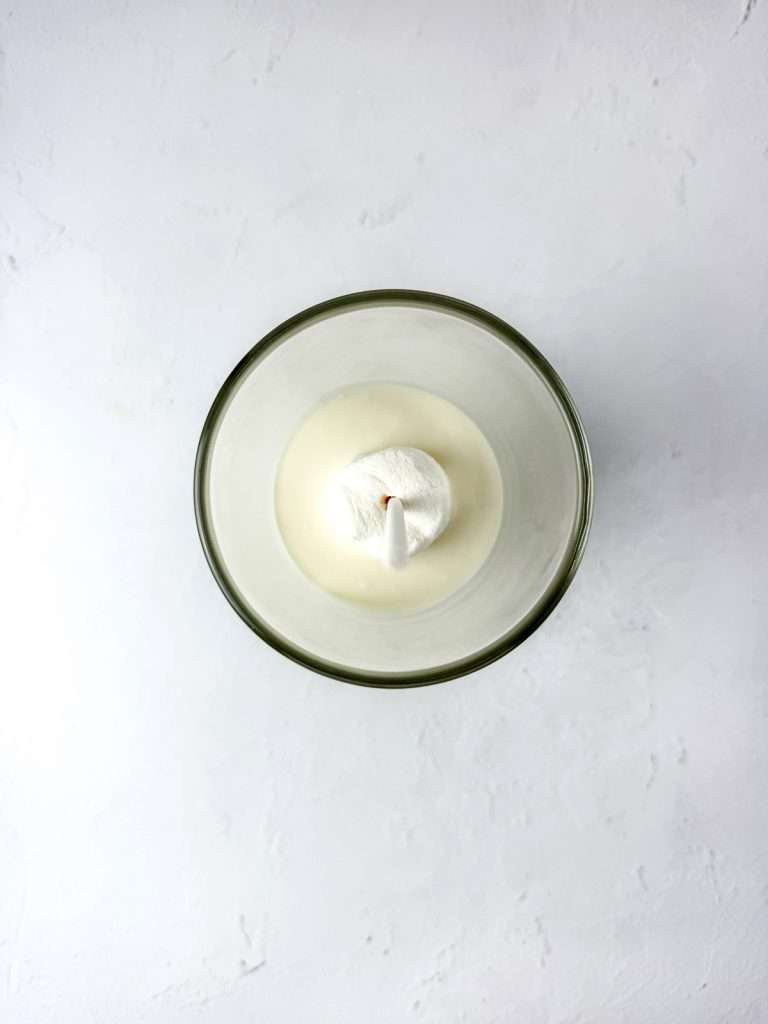
- Melt the remaining white candy melts: Repeat the process to melt the rest of the white candy melts. Pour the melted white chocolate into a tall glass.
- Dip and swirl. Dip each marshmallow into the melted white chocolate, letting the excess chocolate drip back into the glass. Place on the prepared pan.

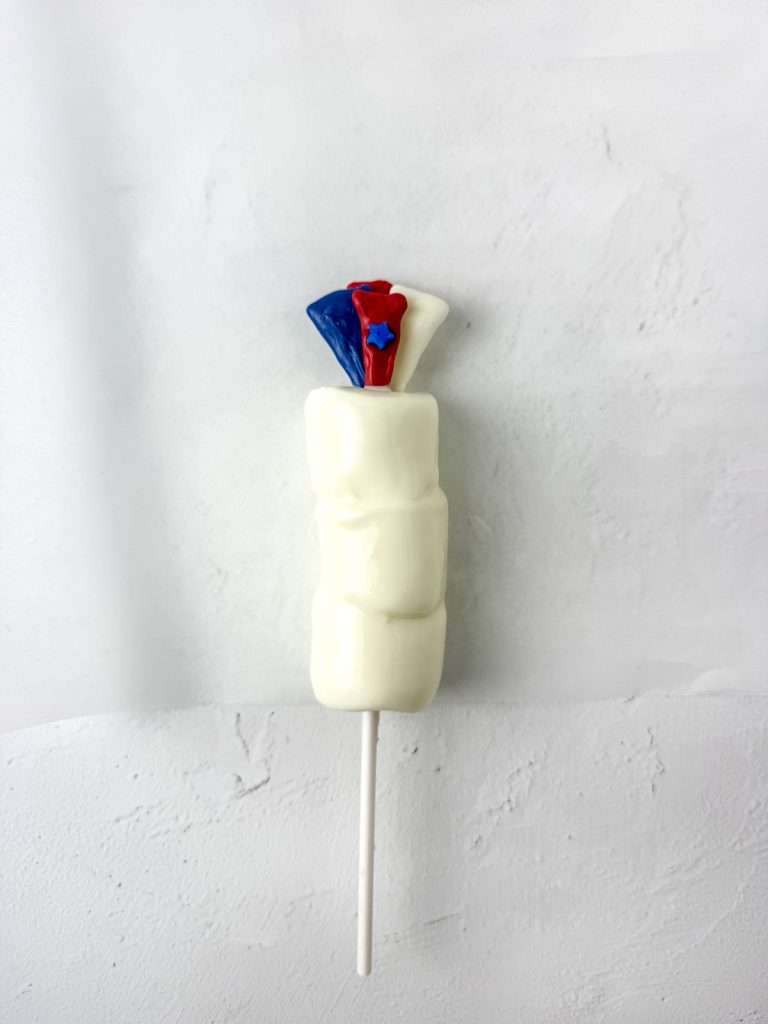

- Add toppers: Stick some dried chocolate triangles into the top marshmallow before the chocolate sets. Add as many as you like. Repeat this process for each stick.
- Let set: Place the chocolate-covered marshmallows into the freezer for about 10 minutes to allow the chocolate to set before the next step.
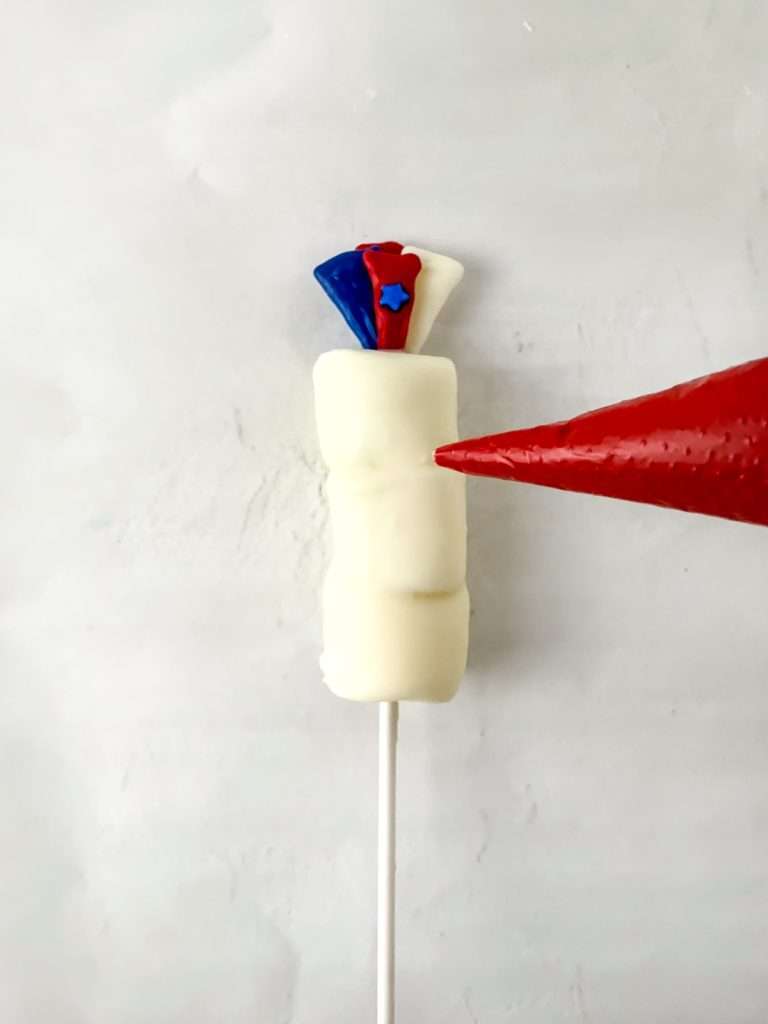
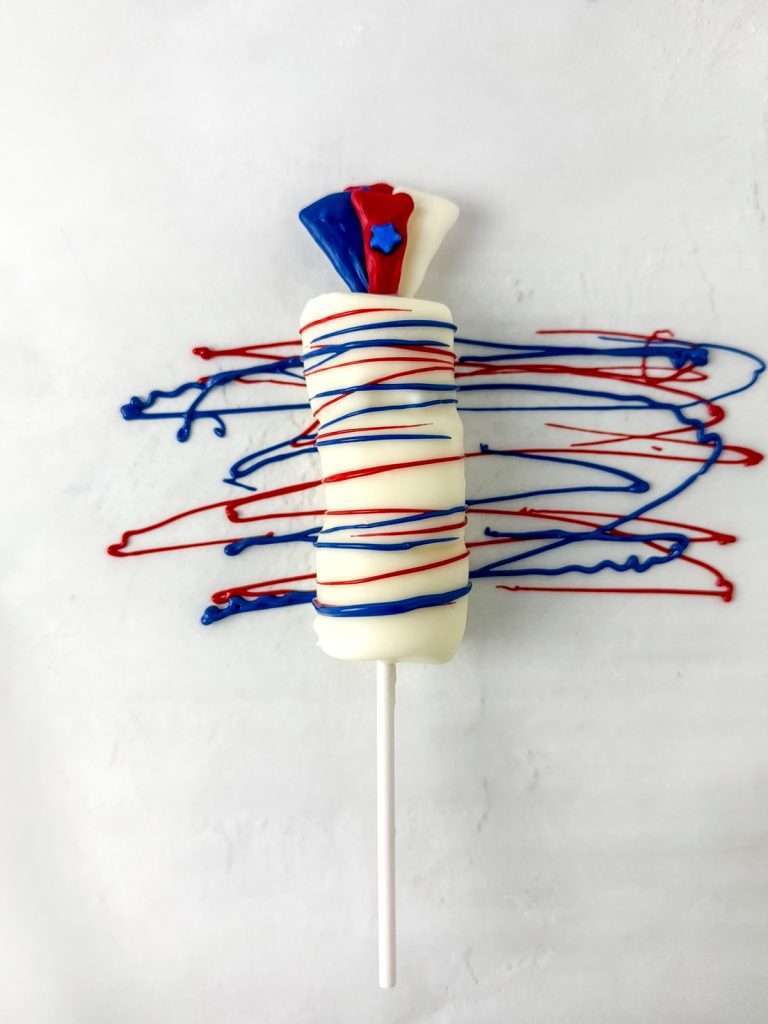

- Decorate: Remelt the piping bags in the microwave in short 15-second intervals. Gently massage the bags to make sure the chocolate is completely melted. Use the piping bags to drizzle red and blue melted chocolate over the marshmallows. Then sprinkle on Pop Rocks, sanding sugar, and festive sprinkles.
- Let them dry. Allow the marshmallows to set in a dry place at room temperature until the chocolate hardens. Finish by brushing with edible glitter.

Pro Tip: Add a teaspoon of coconut oil to each batch of candy melts before melting for a smooth, glossy finish.
More Decorating Ideas


This red, white, and blue version is perfect for the 4th of July, Memorial Day, or any patriotic celebration. But this easy treat is totally customizable!
Switch up the candy melt colors to match birthday themes, sports team parties, baby showers, football tailgating parties, or even Valentine’s Day. It’s a great way to get the kids involved because decorating is so much fun.
- Valentine’s Day: Use milk chocolate or dark chocolate, pink sprinkles, and heart-shaped candy pieces.
- Mermaid Birthday Party: Use blue candy melts, pearl sprinkles, and goldfish crackers.
- Easter: Any pastel color for the base, then add other pastel swirls, sprinkles, and mini M&Ms.
- Gourmet Options: Dip in melted caramel, then add a layer of chocolate on top. Decorate with sea salt, graham cracker crumbs, finely chopped nuts, or crushed toffee bar pieces.
How to Store Chocolate Covered Marshmallows
Once your treats are set, they’re ready to serve or store for later! Just make sure they’re completely dry before storing.
- Place in a covered container lined with parchment paper.
- Store in a cool, dry place for up to 5 days.
- For longer storage, use an airtight container in the fridge.
These also make fantastic additions to a homemade gift basket. Just wrap a few in a clear treat bag, tie with ribbon, and you have the perfect treat for friends, neighbors, or party guests.
Display your Marshmallow Pops
No products found.
No products found.
No products found.
No products found.
Creative Plating & Display Tips
Whether you’re hosting a backyard barbecue or putting together a dessert table, presentation makes a big impact. Here are a few ways to show off your chocolate-covered marshmallows in style:
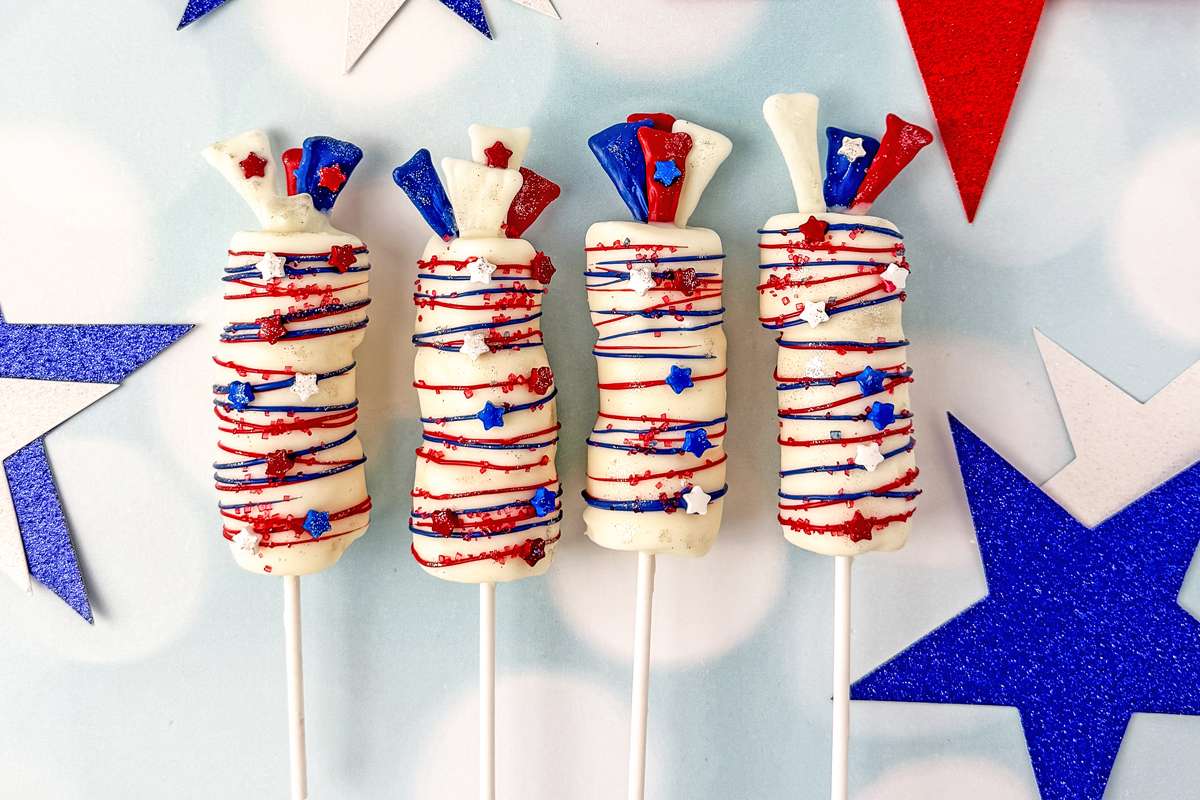
- Firecracker Pop Display: Stand the marshmallow pops upright in mason jars filled with red, white, and blue candy, sprinkles, or shredded paper filler for a festive 4th of July look.
- Tiered Tray Layout: Use a 2- or 3-tiered dessert stand to showcase your pops alongside other patriotic treats like cookies, mini cupcakes, or chocolate-dipped strawberries.
- Individual Treat Bags: Wrap each marshmallow stick in a clear cellophane bag tied with red or blue ribbon. Perfect for party favors or picnic baskets.
- Centerpiece Arrangement: Stick them into a foam base inside a small bucket or planter. Add flags, pinwheels, or other holiday decorations to complete the centerpiece.
- Flat Lay Serving: Arrange the pops flat on a parchment-lined baking sheet or platter in a zigzag or starburst pattern. Add a few sparkly accents or edible glitter for extra flair.
These little extras turn your easy treat into a show-stopping dessert guests will talk about all summer long!
Troubleshooting Common Issues
- Chocolate Grainy or Seized: If your chocolate turns grainy or thick, it’s likely seized due to water or overheating. Always use a dry microwave-safe bowl and melt in short bursts, stirring frequently. Add a bit of coconut oil to help smooth it out if needed.
- Toppings Not Sticking: If your sprinkles and toppings are falling off, the chocolate has already started to harden. Work quickly and decorate each marshmallow immediately after dipping for best results.
- Marshmallows Sliding Off Stick: This happens when the inside of the marshmallow gets too warm. Ensure your marshmallows are at room temperature, and insert the sticks straight through the center. You can also gently twist the stick as you push it in for a tighter grip.
Pro Tip: Chill the marshmallows for 5–10 minutes after dipping to help the chocolate set faster and hold everything in place.


FAQs about Chocolate Covered Marshmallows
Chocolate-Covered Marshmallows for Any Occasion
No matter the time of year, these chocolate-covered marshmallows are always a hit. Simple to make, full of sweetness, and totally festive. They’re the kind of dessert that makes any day even sweeter.
Pin this idea for later!

How to Make Patriotic White Chocolate Covered Marshmallows

Ingredients
- 24 regular marshmallows
- 10 oz white candy melts
- 3 oz red candy melts
- 3 oz blue candy melts
- red, white, and blue sprinkles
- 1 pack Pop Rocks candy
- red and blue sanding sugar
- edible glitter
- coconut oil optional for smoother chocolate
Instructions
- Prep your station: Line a baking sheet with parchment paper. Stick 3 marshmallows on each lollipop stick.
- Melt the chocolate: In a microwave-safe bowl, melt the blue candy melts in 15-30 second intervals, stirring in between. If the chocolate seems too thick, stir in some coconut oil to thin it out.
- Make the toppers: Put the chocolate in a piping bag and snip off a small hole at the end. Pipe 2-inch triangles on the parchment paper. Add some sprinkles before the chocolate hardens. Repeat this process with the red and 3 ounces of the white candy melts to have red, white, and blue triangles.
- Melt the remaining white candy melts: Repeat the process to melt the rest of the white candy melts. Pour the melted white chocolate into a tall glass.
- Dip and swirl. Dip each marshmallow into the melted white chocolate, letting the excess chocolate drip back into the glass. Place on the prepared pan.
- Add toppers: Stick some dried chocolate triangles into the top marshmallow before the chocolate sets. Add as many as you like. Repeat this process for each stick.
- Let set: Place the chocolate-covered marshmallows into the freezer for about 10 minutes to allow the chocolate to set before the next step.
- Decorate: Remelt the piping bags in the microwave in short 15-second intervals. Gently massage the bags to make sure the chocolate is completely melted. Use the piping bags to drizzle red and blue melted chocolate over the marshmallows. Then sprinkle on Pop Rocks, sanding sugar, and festive sprinkles.
- Let them dry. Allow the marshmallows to set in a dry place at room temperature until the chocolate hardens. Finish by brushing with edible glitter.
Notes
More Decorating Ideas
- Valentine’s Day: Use milk chocolate or dark chocolate, pink sprinkles, and heart-shaped candy pieces.
- Mermaid Birthday Party: Use blue candy melts, pearl sprinkles, and goldfish crackers.
- Easter: Any pastel color for the base, then add other pastel swirls, sprinkles, and mini M&Ms.
- Gourmet Options: Dip in melted caramel, then add a layer of chocolate on top. Decorate with sea salt, graham cracker crumbs, finely chopped nuts, or crushed toffee bar pieces.
