
DIY No Sew Bird Costume


If you are looking for perfectly measured pattern pieces, precise stitching, and professionally finished edges, you can stop reading now (unless you would like to stick around for some laughs).
You need to know right up front that I am no seamstress. But I would rather spend a couple of hours creating something special for my kids than going out and blowing big bucks on a costume they are going to wear only a few times.
Last year about 3 days before Halloween my daughter decided she wanted to be a bird. It was too late to order anything online without paying way too much for shipping. She knew exactly what she wanted it to look like in her head and sketched for me (she is very artistic!). Once I saw her drawing I knew it would be nearly impossible to find anything like it in stores. I chose to make it.
With only 3 days to complete this project, I quickly decided I was not going to finish the edges of all those feathers. In fact, I decided I wasn’t even going to get my sewing machine out. So, I came up with the idea of using fabric glue, lightweight fabric, bias tape, plus a few other supplies to create it.
Here’s how I made the quickest DIY No Sew Bird Costume ever.

You’ll need 1 1/4 yards of lightweight cotton fabric for the base, quarter yard pieces of various colors for the feathers (I used blue, green, purple and pink), a package of double fold bias tape, fabric glue, and a package of feathers (available at craft stores). Other items you’ll need that aren’t pictured are scissors, a yardstick, a marker, chalk, a ruler, and bird shaped buttons.

Begin with your large piece of fabric folded right sides together as shown. The folded edge should be at the top.
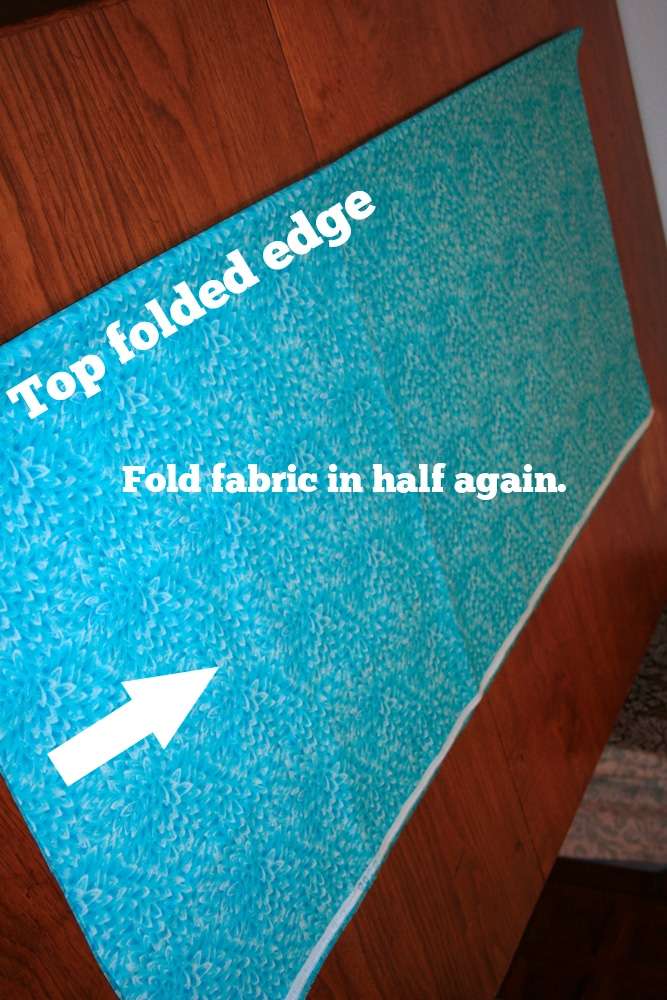
With the folded edge positioned at the top, fold the fabric again left to right.
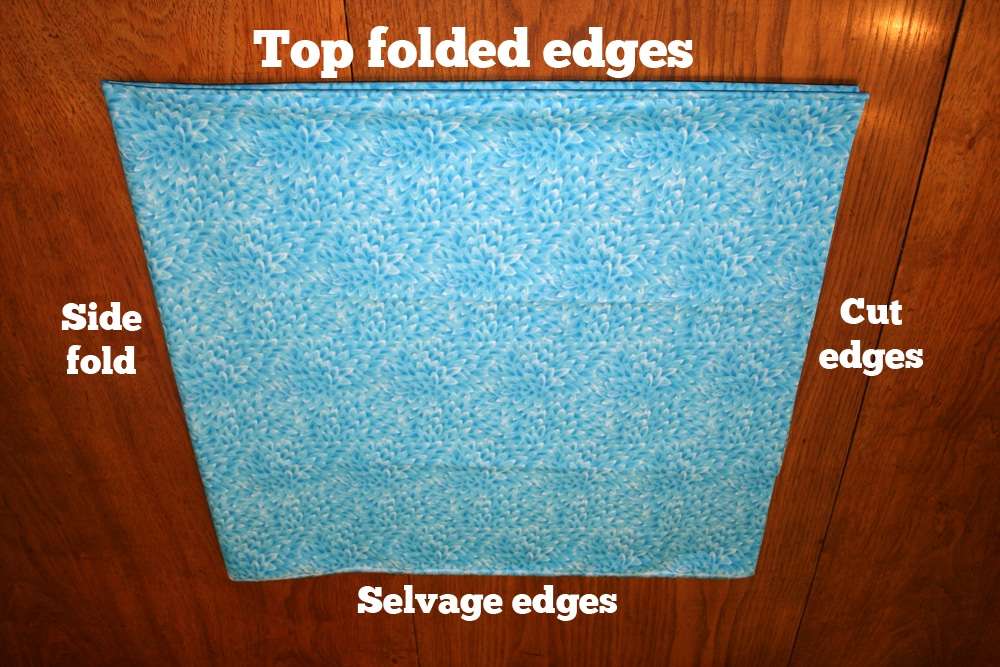
Your fabric should look like this.
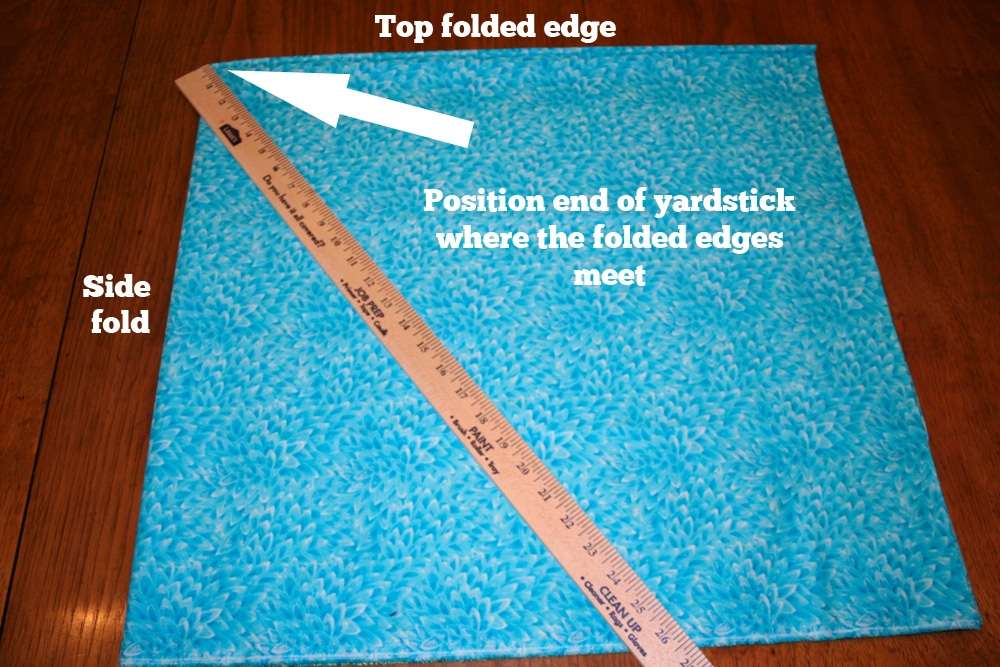
You’ll need to cut your base fabric in the shape of a half-circle. To do this, I used a yardstick like a compass. Place one end of the yardstick where all the folded edges meet. Keeping that end right at the folded corners, pivot it along the fabric making tic marks at 22 inches from the side fold edge to the cut edges (see images above).

Use a marker to connect your tic marks. You should end up with something that looks like this.

Cut through all layers of the fabric on the line. Do not discard the excess fabric! You can use this to make a coordinating headband for the costume. Instructions below.

Next, unfold the fabric. It should now be a complete circle. Refold it into a half-circle with right sides facing out this time.
Using a ruler and a piece of chalk, mark horizontal lines across the fabric about 3 inches apart. You don’t have to be super precise with this.

Glue all the edges of the half-circle together by placing dots of the fabric glue along the edges and press together with your fingers. Set aside to dry while you work on cutting the feathers.

I really didn’t stress over getting the feathers to be exactly the same size or shape. I warned you this was not going to be professionally done! LOL!
Fold the fabric as shown above. You should end up with a folded piece measuring about 4.5 inches by 5.5 inches. Free-hand sketch a feather shape. I was going for a slightly rounded triangle, but you could make it more pointed or more rounded…whatever you prefer.

Now for the fun part! Gluing on all the feathers. It’s important to do a dry fit of the feathers. This will help you decide how much you want them to overlap and how you want the colors arranged. Start at the bottom and work your way up.

When you’re happy with the arrangement, pull the feathers down a little and dot the fabric glue just below your chalk line.
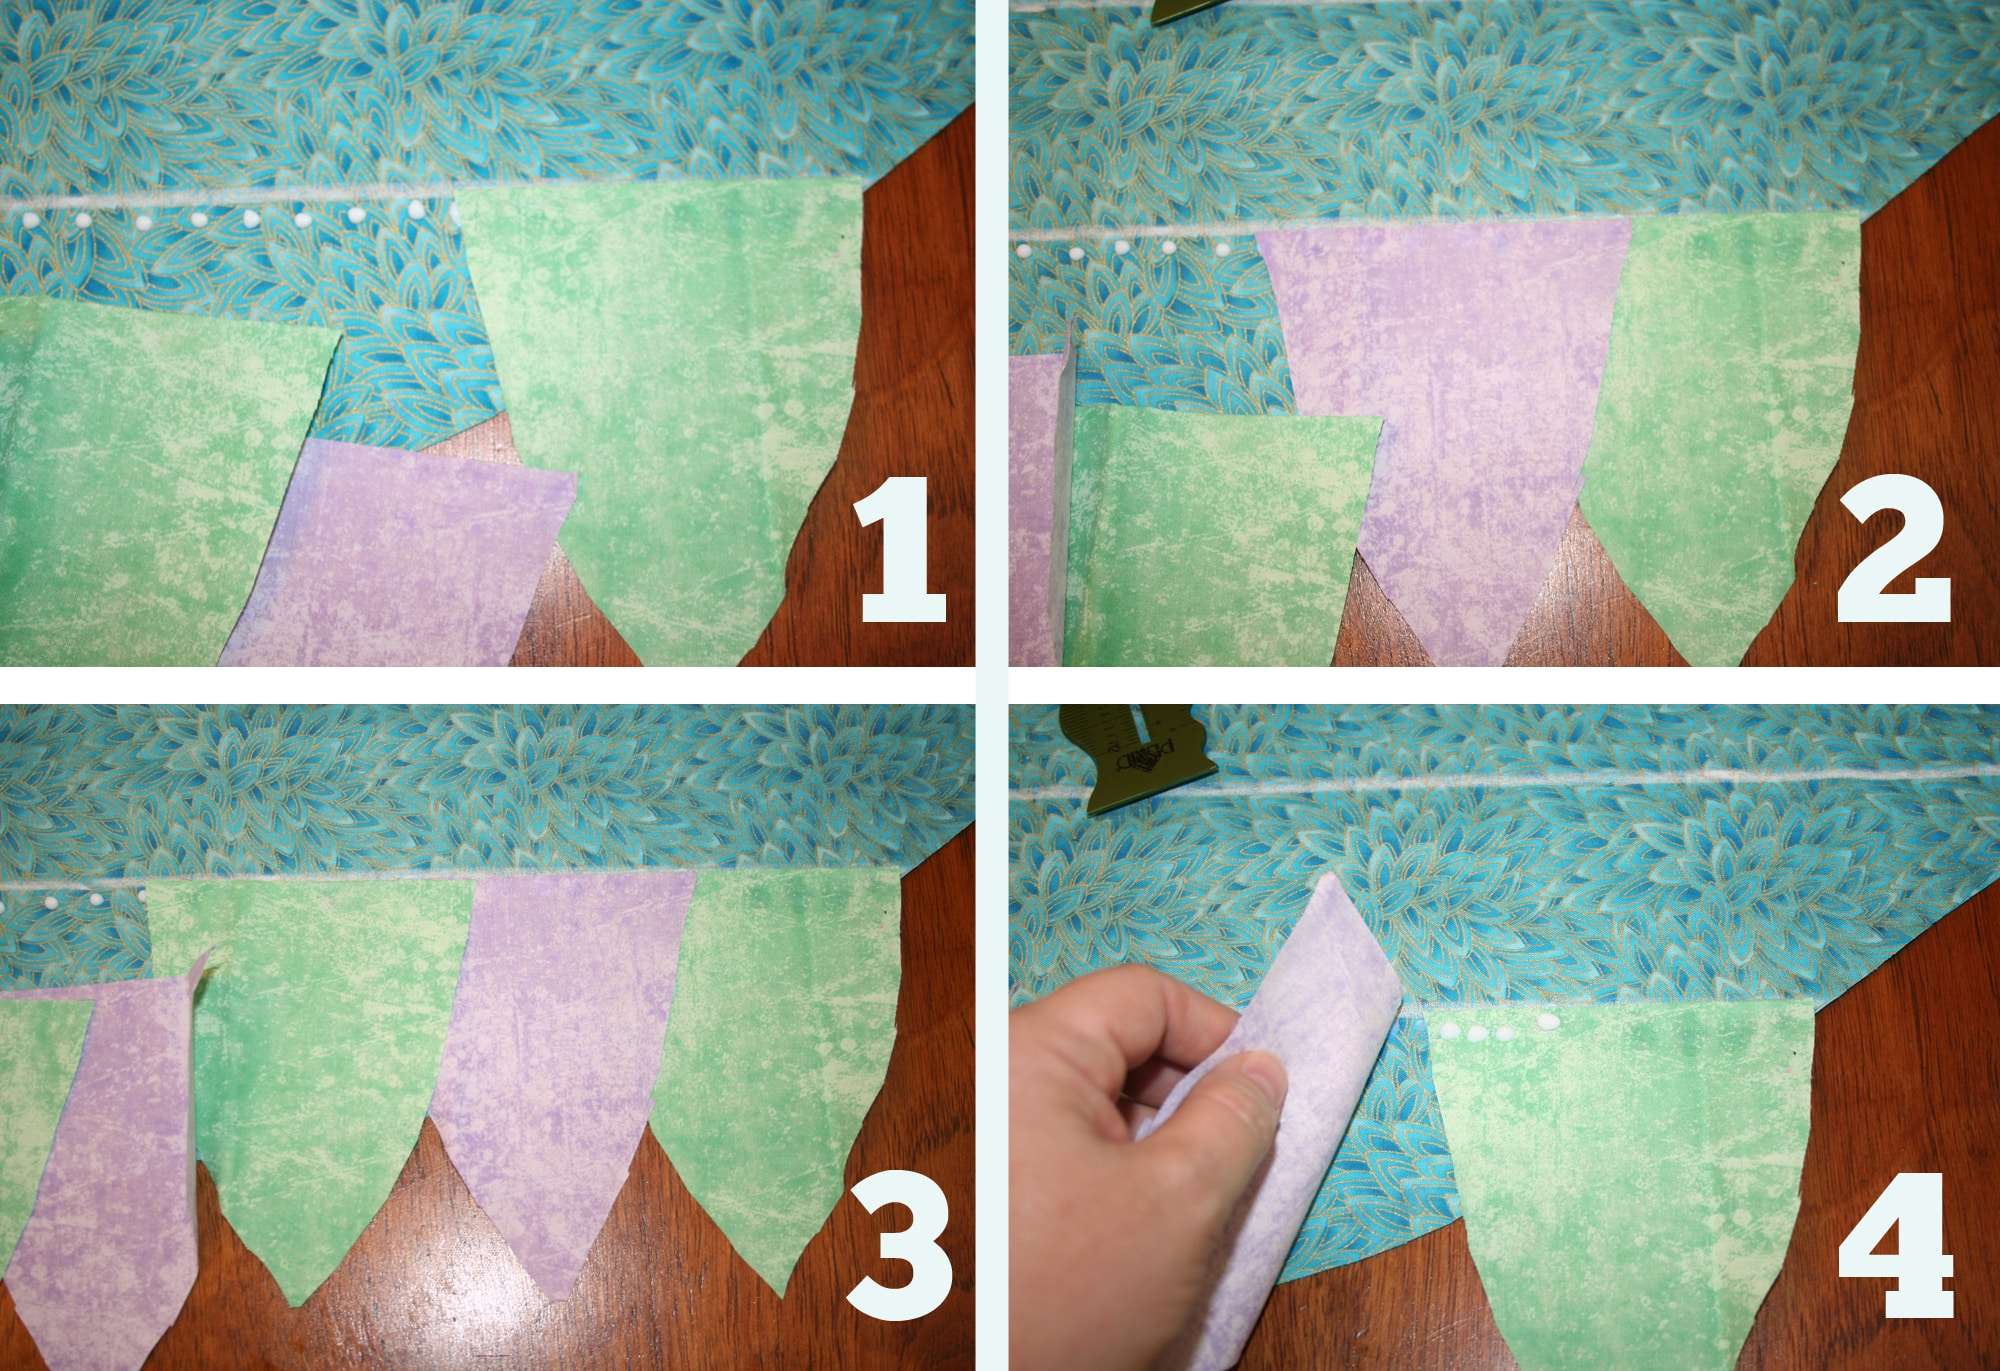
For some unknown reason I placed the feathers right-to-left. If you want to work left-to-right that is probably more “normal,” but either way will work. 🙂
Place your first feather at the edge of the fabric. Follow your chalk line and keep adding feathers overlapping them a little. The glue takes a while to set, so you’ll have some time to rearrange your feathers if needed. Once you are happy with the placement, go back and add glue where the feathers overlapped (see pic 4 above).

Repeat the dry fit, gluing, and feather placement working line-by-line all the way up your fabric. I used 2 colors per row alternating colors every row. This made for a very colorful look which is what my daughter requested.
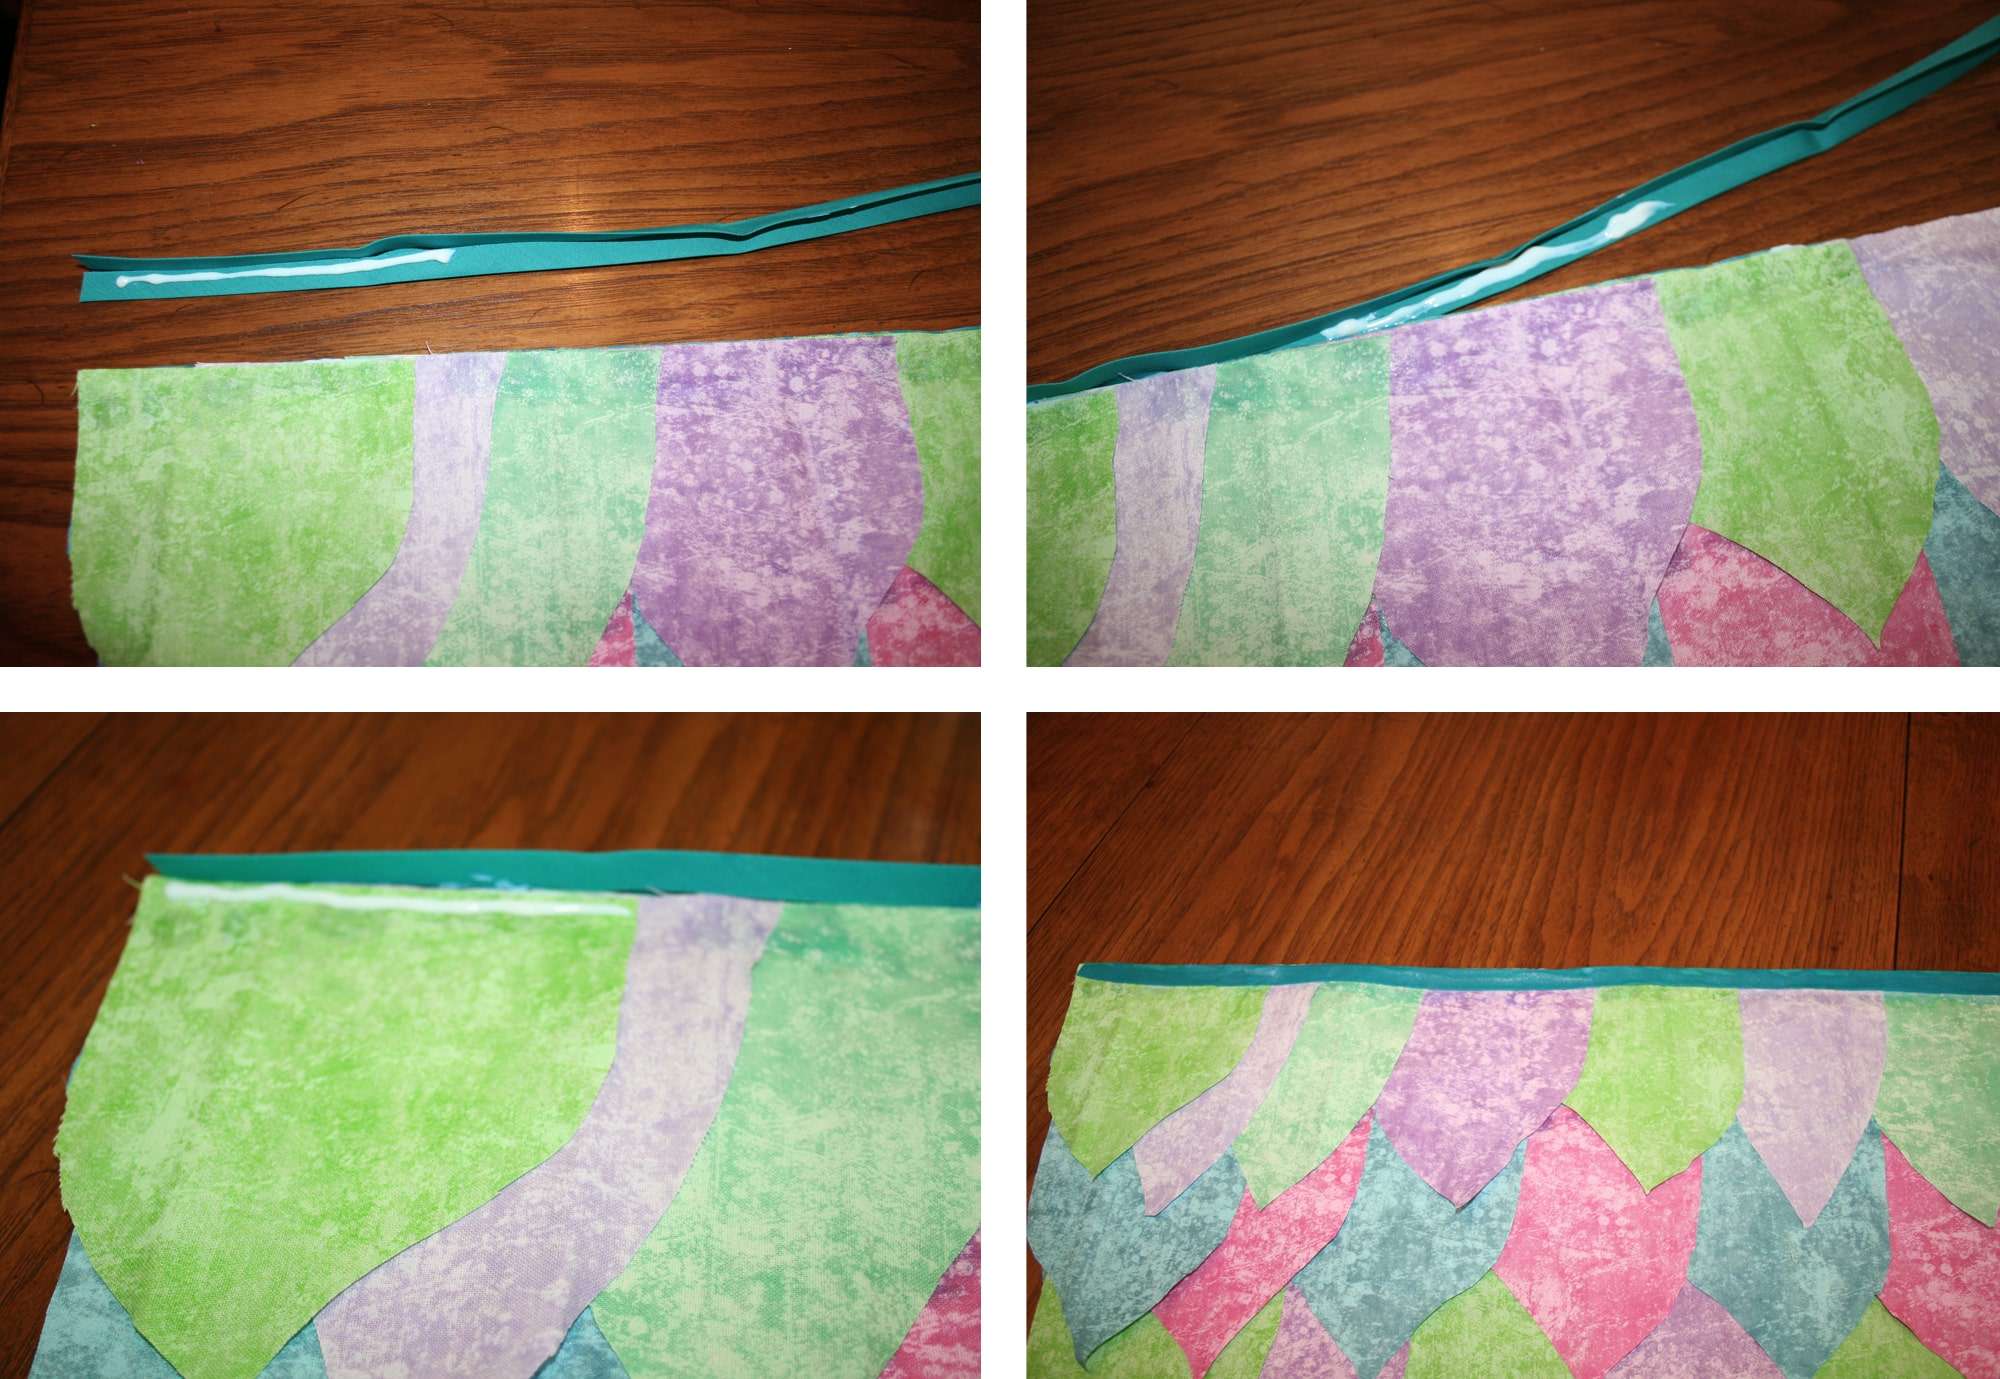
For a finished look, glue the bias tape along the top edge as shown.
The entire project to this point took me about 2 hours!
Allow to dry overnight.

Hand stitch the left over bias tape at the center of the cape. Use this to tie around the neck. To keep it from pulling too much, I secured the back center of the cape to her t-shirt with a large safety pin. I also stitched some coordinating ribbon to tie around her wrists.

You can see the safety pin in the back better in this pic. I added a couple more bird shaped buttons on the front side where the ribbons were stitched to tie around the wrists.
Coordinating Bird Costume Headband

To make the headband, grab the scraps from your base fabric. Roll the fabric as shown. Stick feathers into the layers. Hand stitch a cute button in the center.

You can simply tie the headband around your child’s head. Five minute headband done!
(If you don’t want to make your own, you can also find some cute peacock headbands on Amazon HERE!)
By simply varying the colors of the base and feathers, this costume could be any kind of bird.
White feathers = a swan
Black feathers = a crow
Shades of brown feathers = an owl
Shades of blue feathers = a bluejay
There are so many possibilities!
I thought my daughter would wear this once and be done with it, but a year later this costume is still holding up great! Since wearing it for Halloween, she has played in it numerous times and still pulls it out of her closet when she feels the need to fly. (I just love that girl so much!)
I hope this helps with a last minute costume idea or a fun dress-up costume for your kiddos. If they are anything like my daughter, they won’t even notice it isn’t perfect.
Love it? Pin it!


If you want to make this but you’re an adult and not a child does the fabric size need to be larger than 1 1/4 yard?
Yes, I would make it larger for an adult.